Learn SPD · Decontamination
Decontamination is where used medical devices begin their journey back toward safe use.
It is a controlled process designed to reduce contamination, protect personnel, and prepare reusable devices for the steps that follow.
Before You can Make it Safe, You have to make it clean.
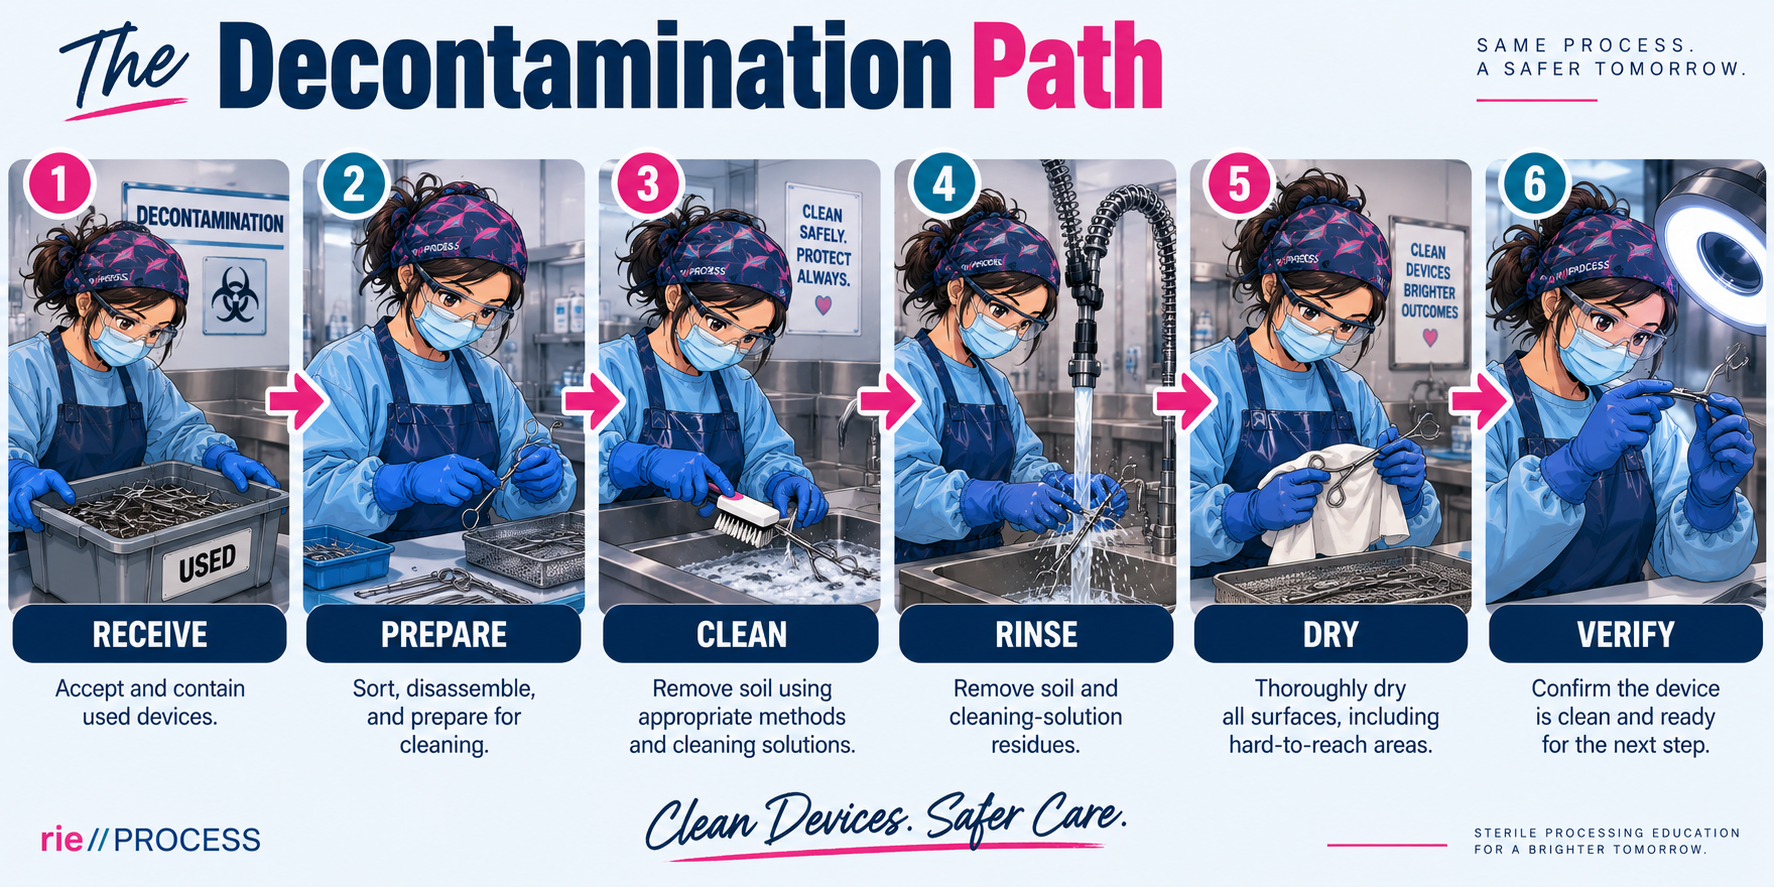
The Purpose of Decontamination
This isn’t just the “dirty side.”
Decontamination is the beginning of a controlled reprocessing system.
Devices arrive contaminated from patient care. The work performed here reduces contamination and prepares those devices to move safely and effectively through the rest of the process.
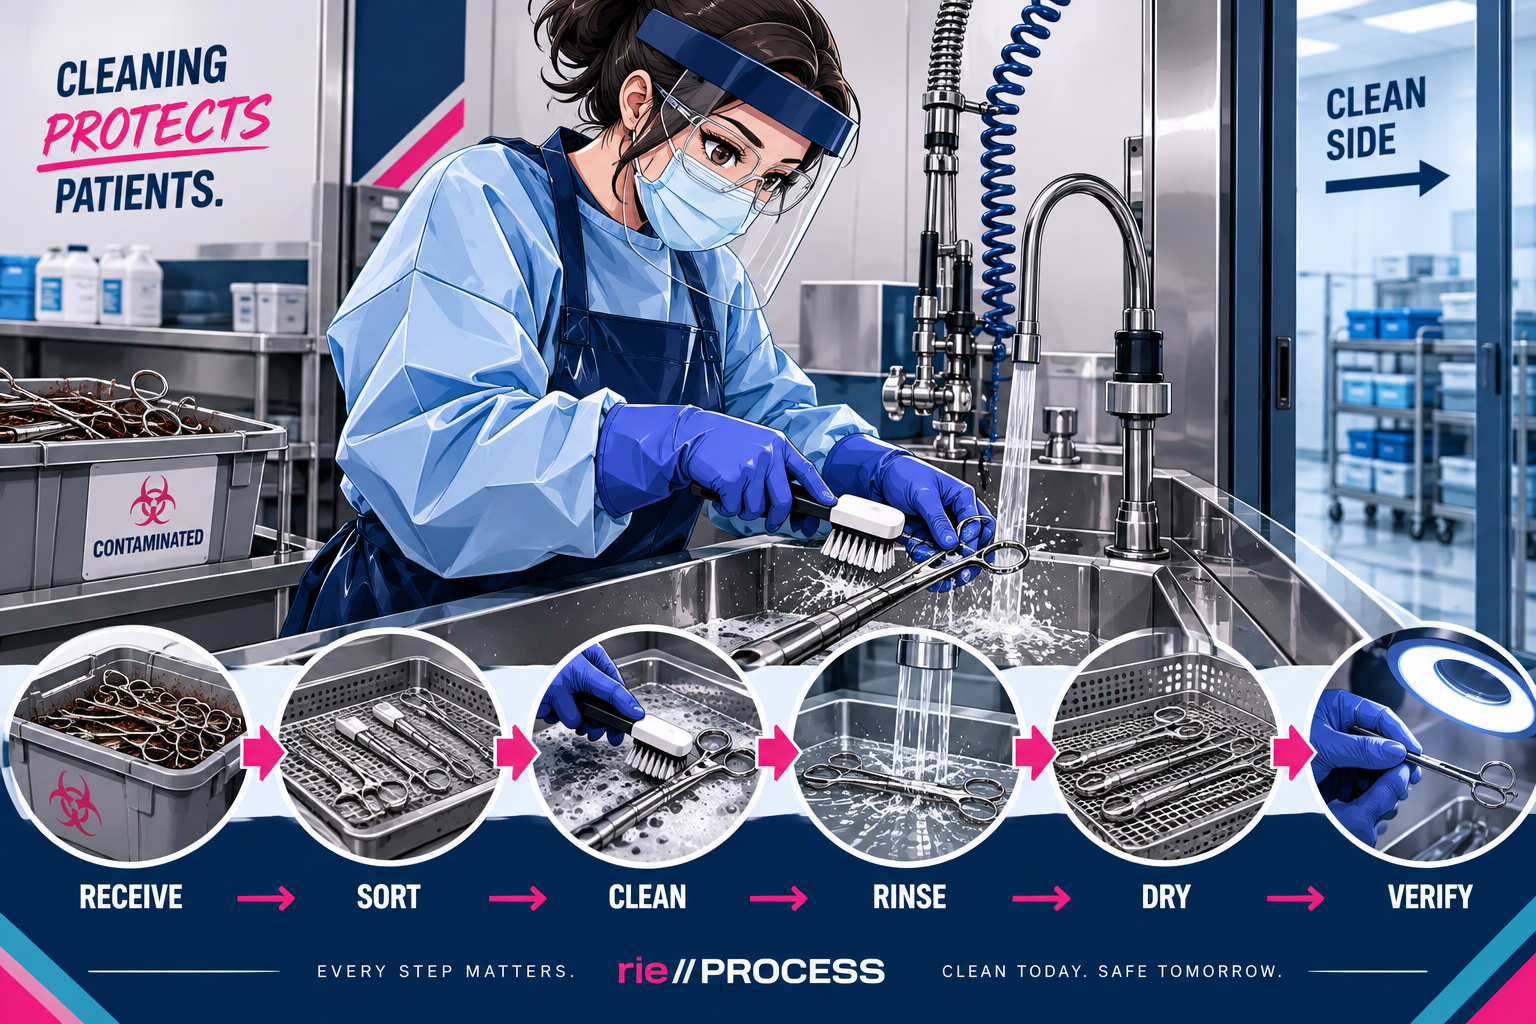
RECEIVE → PREPARE → CLEAN → RINSE → DRY → VERIFY
Every step affects the next one.
POOR CLEANING CANNOT BE FIXED BY STERILIZATION.
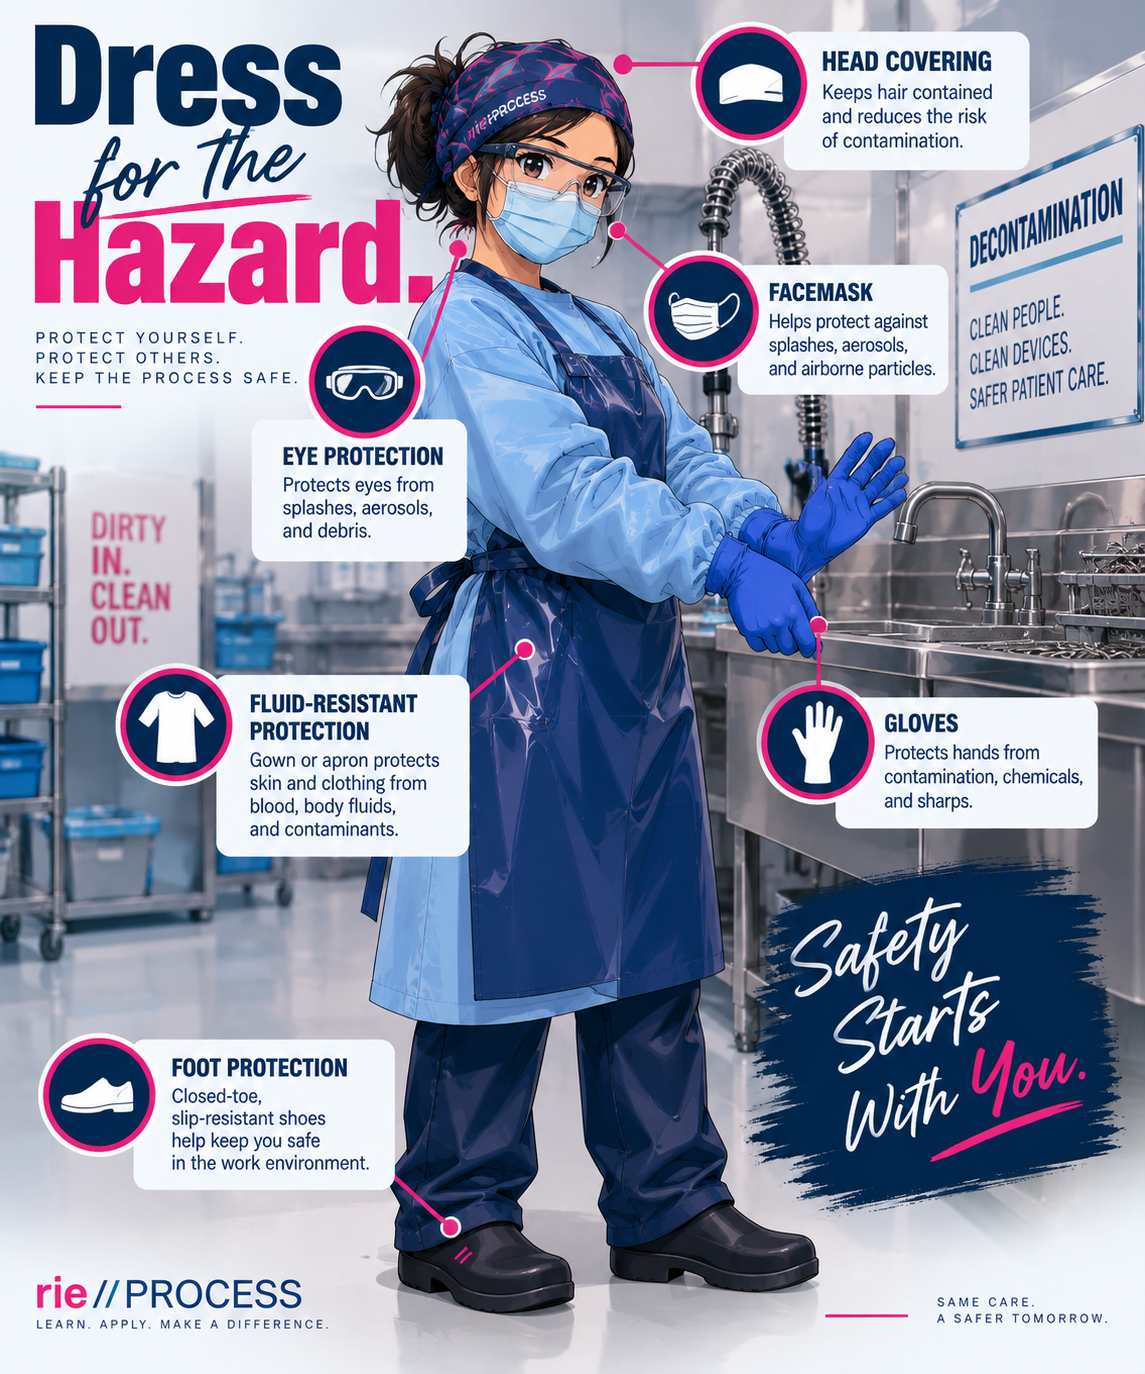
Personnel Safety
The First Thing You Protect Is You.
Contaminated devices can expose personnel to blood, body fluids, chemicals, sharps, aerosols, and other hazards.
Appropriate personal protective equipment creates a barrier between the worker and those hazards.
Depending on the task and facility requirements, decontamination PPE may include:
Head Covering
Face + eye Protection
Gloves
Fluid-Resistant Protection
Foot or Shoe Protection
PPE must be appropriate for the hazards of the work being performed.
Safety starts before the first instrument is touched.
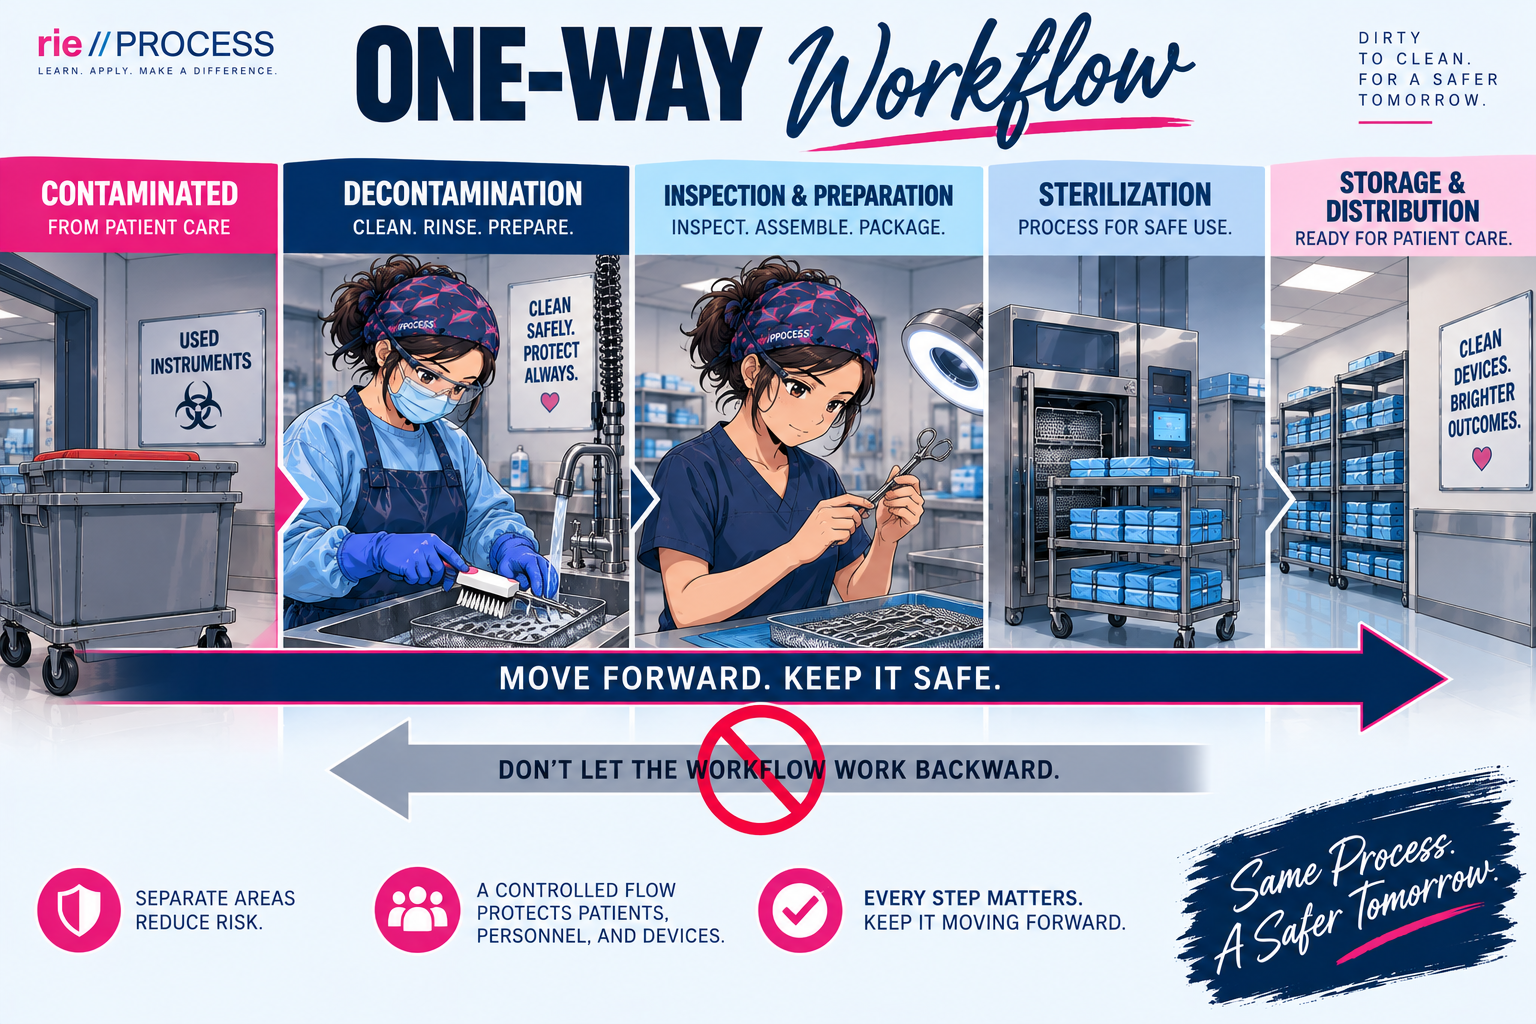
Dirty moves toward clean. Not Back Again.
Sterile processing workflow is designed to reduce the risk of cross-contamination.
Contaminated devices enter the decontamination area.
Cleaning occurs.
Devices that have completed the required decontamination process move forward toward inspection, preparation, packaging, and sterilization.
Contaminated → Cleaned → Prepared → Sterilized
The process should move in one direction.
DON’T LET THE WORKFLOW WORK BACKWARD.
Workflow
Point-of-Use Treatment
Cleaning Doesn’t Begin At the Sink.
What happens immediately after a device is used can affect what happens later in decontamination.
Point-of-use treatment helps prevent soil from drying and supports effective cleaning later.
Devices should be prepared and transported according to the applicable manufacturer’s instructions and facility procedures.
Don’t give soil time to become a bigger problem.
Point-of-use treatment supports decontamination.
It does not replace it.
Transport
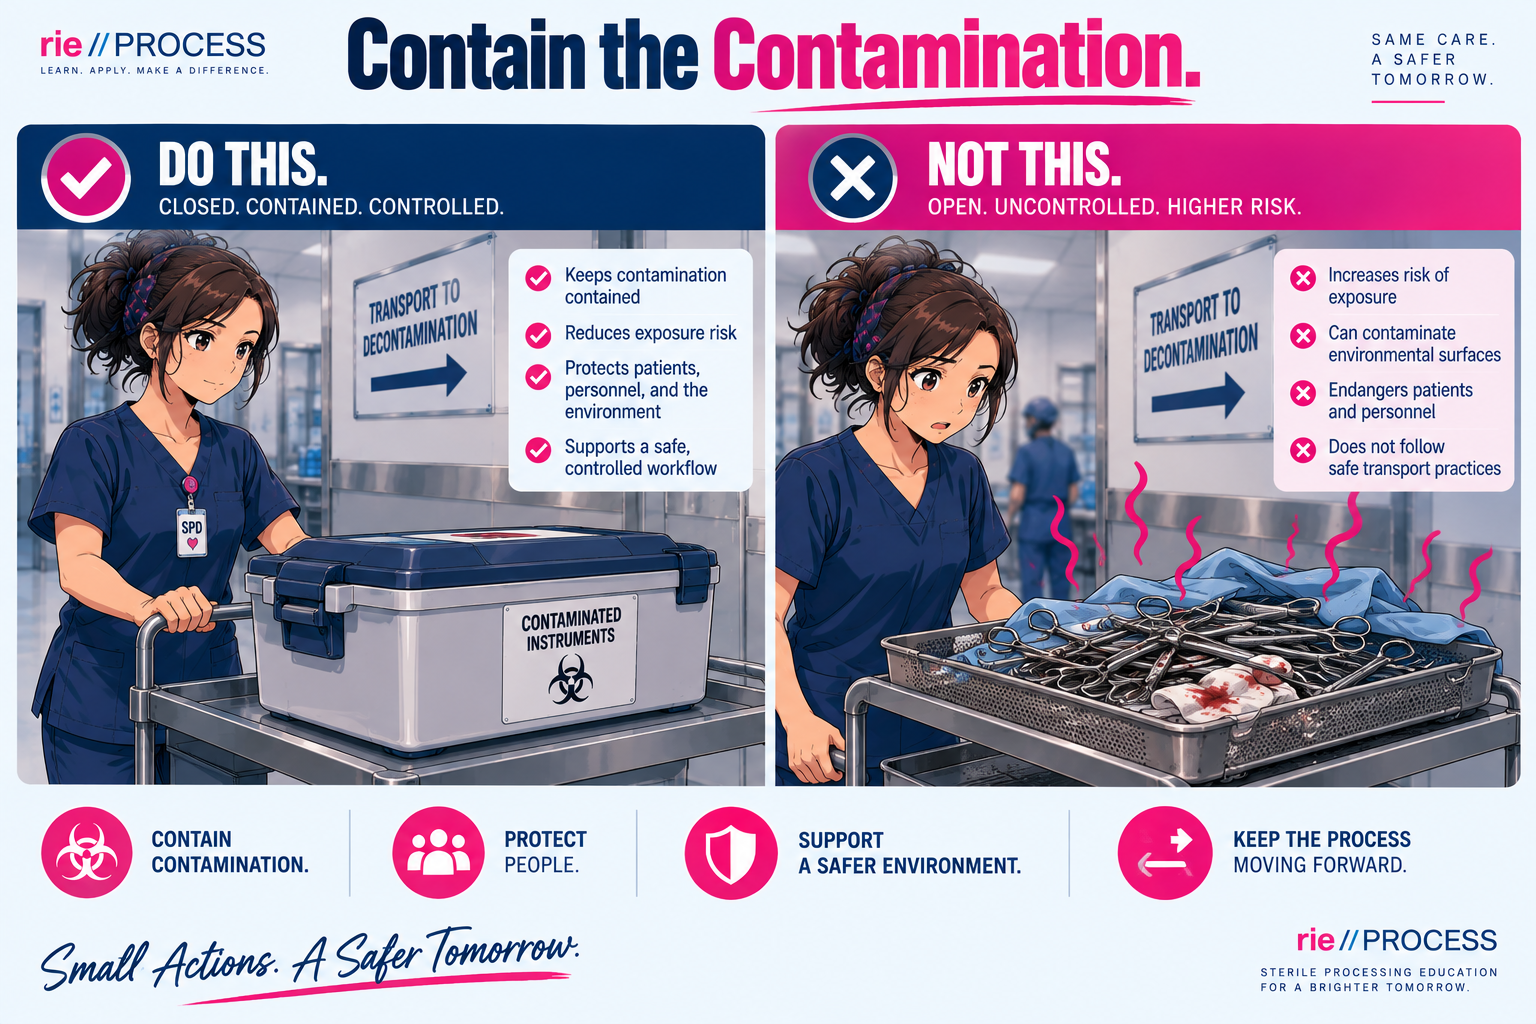
Contain the Contamination.
Used devices must travel from the point of use to the decontamination area without unnecessarily exposing personnel, patients, or the environment to contamination.
Safe transport considers:
CONTAINMENT
LEAKAGE
SHARPS
DEVICE PROTECTION
IDENTIFICATION
FACILITY WORKFLOW
cONTAMINATED DEVICES SHOULD ARRIVE CONTAINED, CONTROLLED, AND READY FOR PROCESSING.
Preparation for cleaning
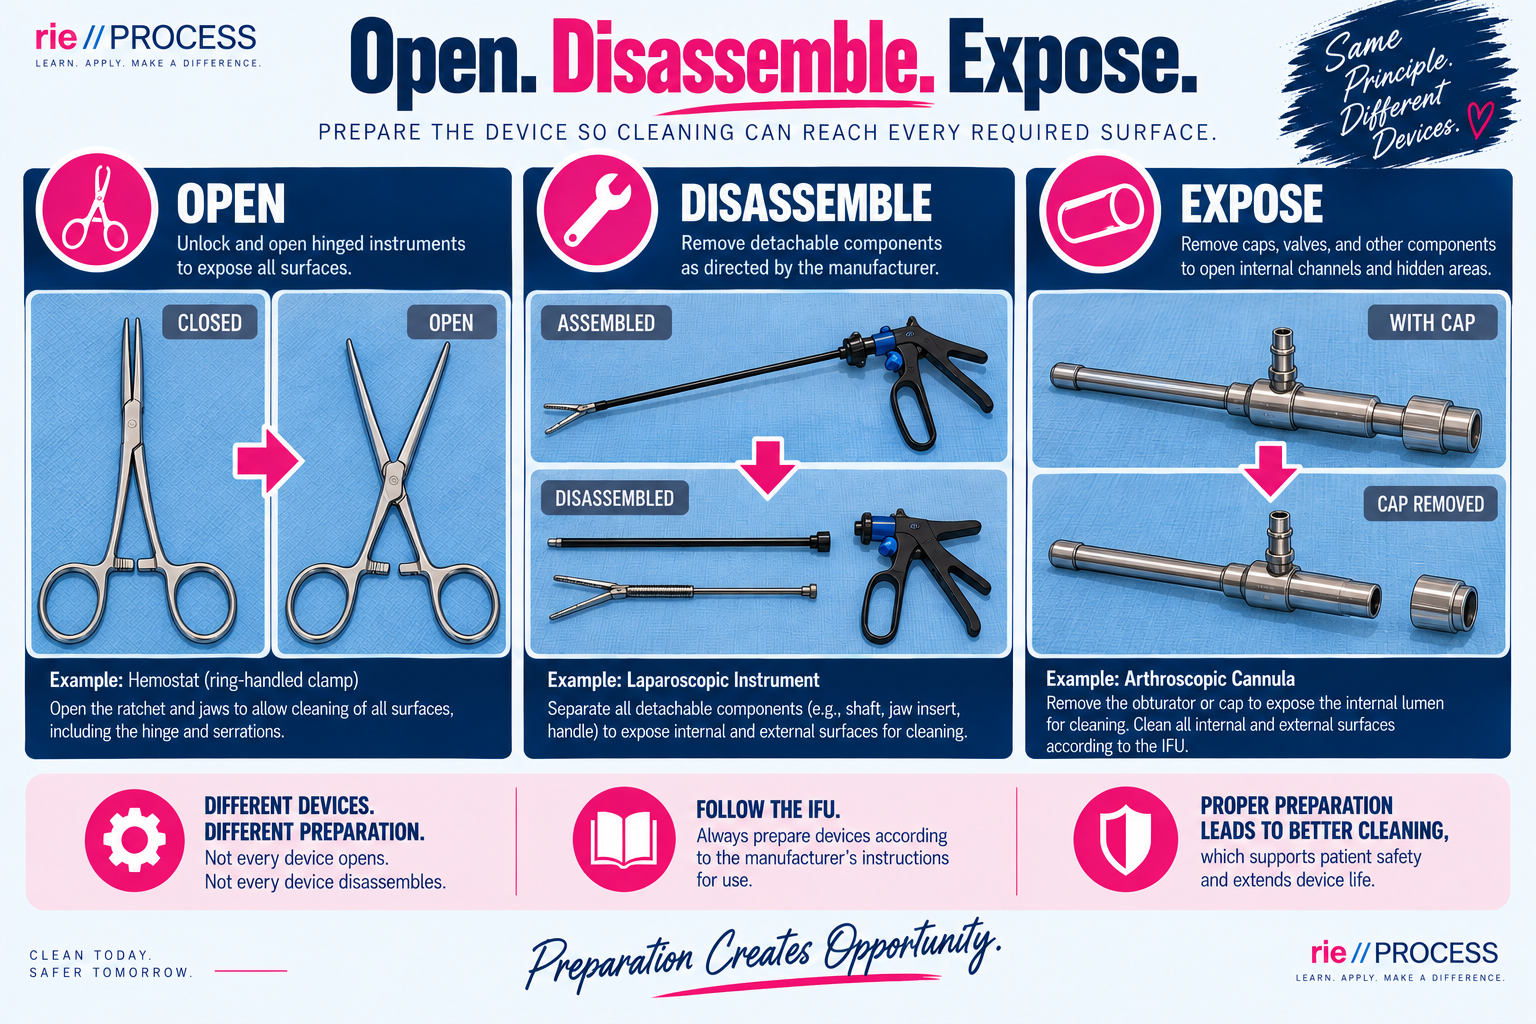
Before cleaning begins, devices must be prepared according to their instructions.
That may require:
OPENING
DISASSEMBLING
UNLOCKING
REMOVING COMPONENTS
ACCESSING INTERNAL CHANNELS
POSITIONING FOR CLEANING
Complex devices may require specific steps before their surfaces can actually be reached.
You Can’t Clean What You Can’t Reach.
Access comes before cleaning.
Device-Specific Processing
Memory Is Not A Cleaning Instruction.
Reusable devices can differ dramatically in their cleaning requirements.
The manufacturer’s instructions may specify:
disassembly
water requirements
detergent type or concentration
temperature
brushing or flushing
immersion restrictions
cleaning equipment
rinse requirements
drying requirements
inspection or verification steps
The Device Determines the Process.
When requirements need to be confirmed, use the current applicable instructions rather than memory or habit.
Related 5-Minute Huddle
Memory Is Not the IFU
When a requirement matters, verify it using the current applicable source rather than relying on memory or “how we’ve always done it.”
Detergents + Cleaning Solutions
The Chemistry Has a Job.
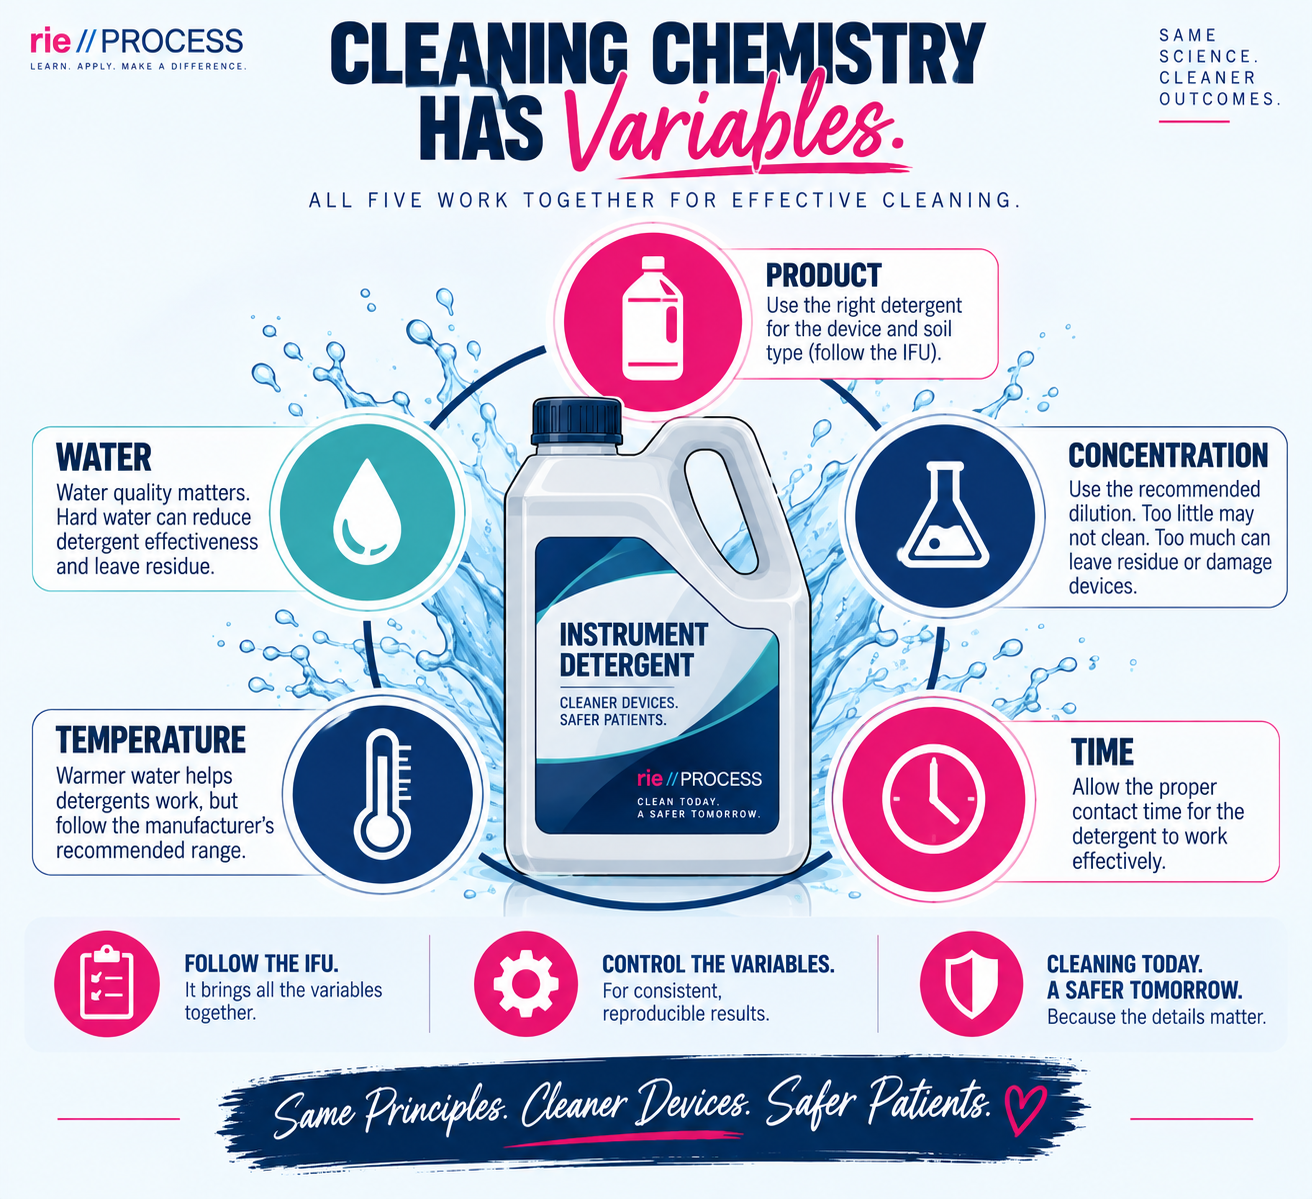
Cleaning solutions help loosen, suspend, dissolve, or remove soils so they can be separated from device surfaces.
Effective use depends on following the applicable requirements for things such as:
CORRECT PRODUCT
CORRECT CONCENTRATION
CORRECT WATER CONDITIONS
CORRECT TEMPERATURE
CORRECT CONTACT TIME
More detergent is not automatically better.
Hotter water is not automatically better.
Longer exposure is not automatically better.
Follow the process.
Don’t improvise the chemistry.
Manual Cleaning
Friction Does The Work.
Manual cleaning uses physical action and appropriate cleaning chemistry to remove contamination from device surfaces.
Depending on the device and its instructions, this may include:
BRUSHING
WIPING
FLUSHING
IMMERSION
IRRIGATION
OTHER DEVICE-SPECIFIC ACTIONS
Cleaning tools should be appropriate for the device and surface being cleaned.
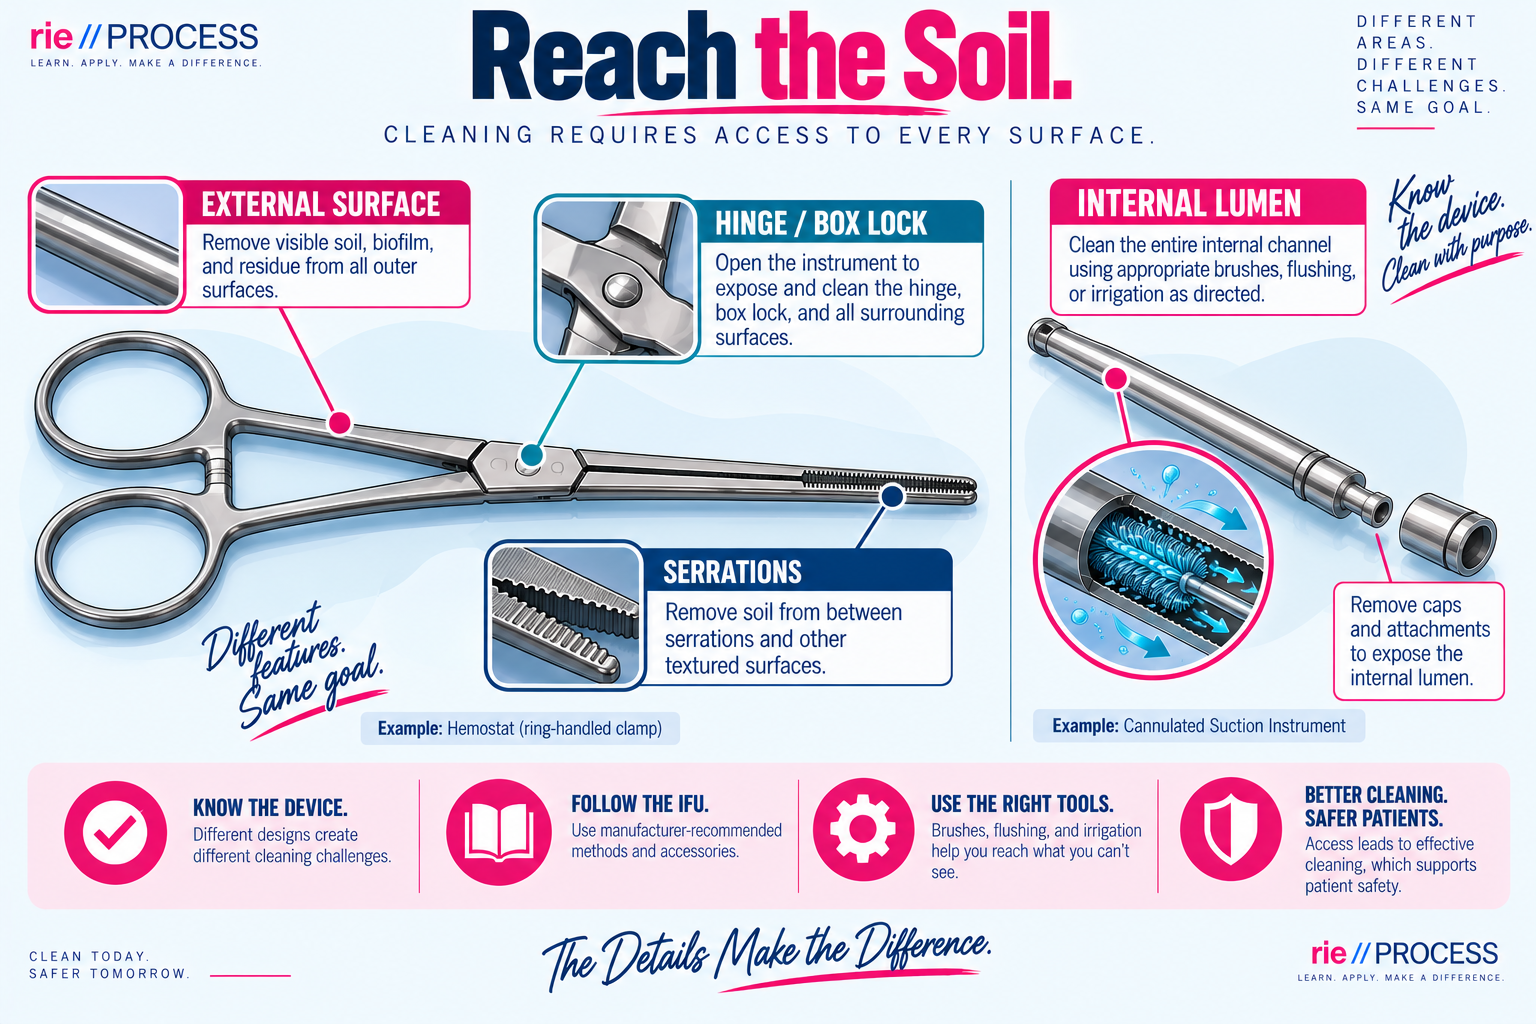
Internal channels require attention just like external surfaces.
If the cleaning action can’t reach the soil, the soil has a place to stay.
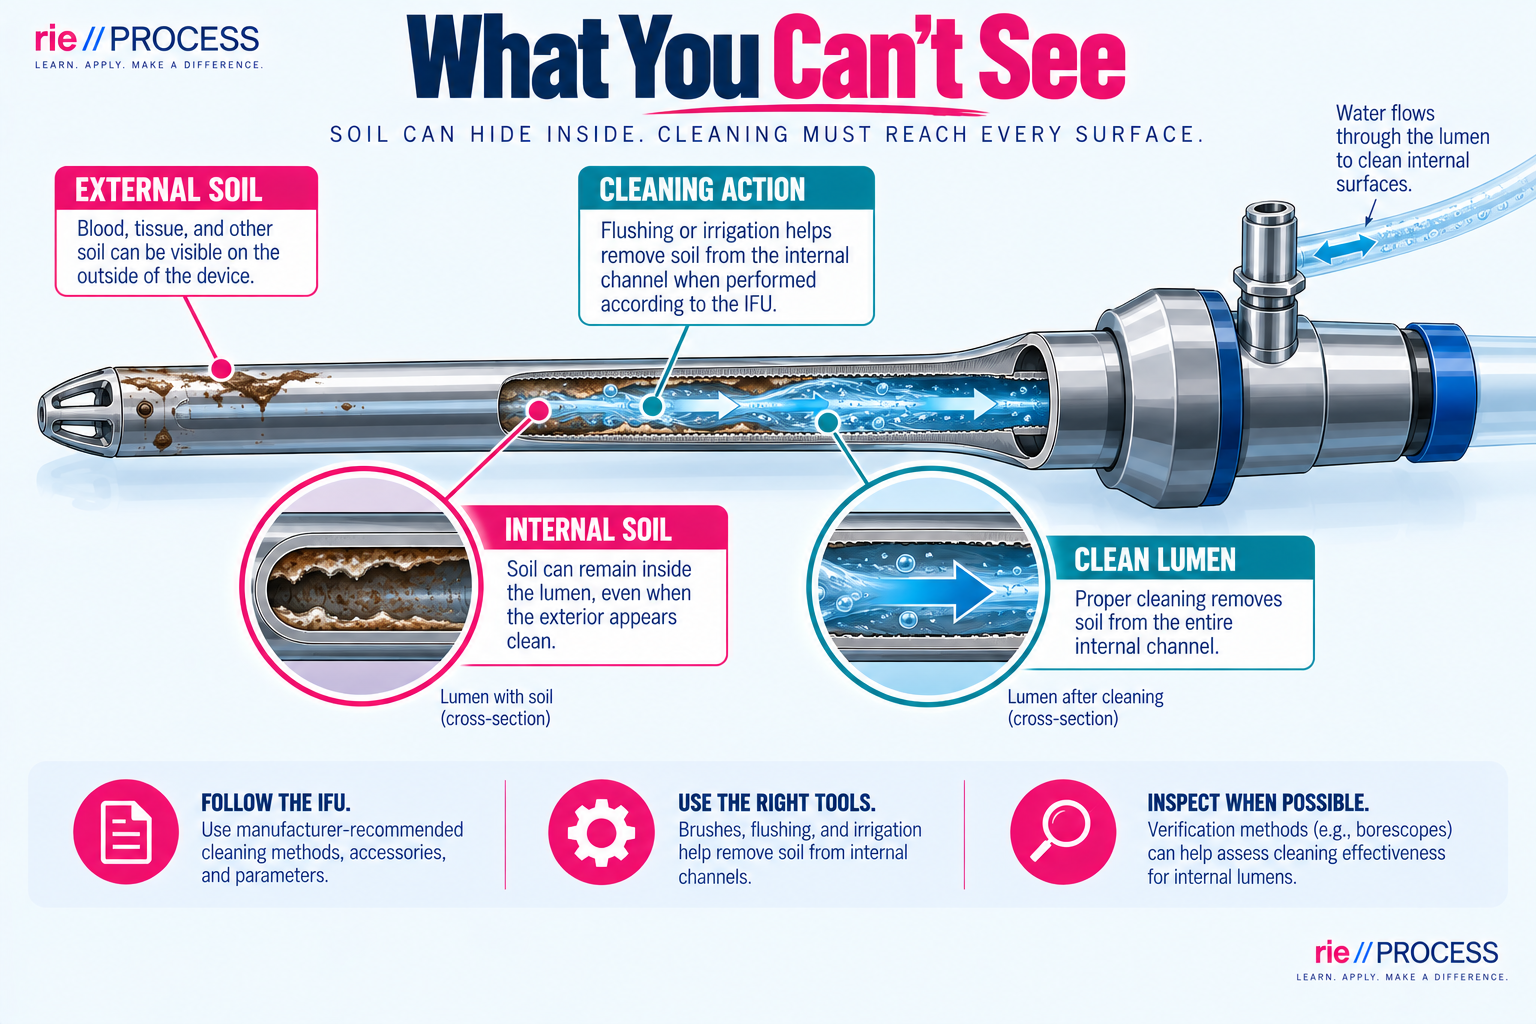
Lumens + Complex Devices
The Outside Isn’t the Whole Device.
Cannulated and complex devices contain internal surfaces that may not be visible during routine handling.
Cleaning may require specific:
brushes
flushing volumes or techniques
adapters
syringes or irrigation devices
mechanical cleaning connections
inspection methods
The exact process depends on the device manufacturer’s instructions.
Out of sight doesn’t mean out of the process.
Mechanical Cleaning
Machines support the Process. They Don’t Replace It.
Mechanical cleaning equipment can provide controlled, repeatable cleaning action when devices are properly prepared and loaded.
Common systems include:
Ultrasonic Cleaners
Use cavitation to help remove soil from accessible surfaces.
Washer-Disinfectors
Use programmed cycles, cleaning chemistry, water, temperature, and mechanical action.
But equipment can only work effectively when the device is compatible, correctly prepared, and properly positioned.
The machine can only clean what the process allows it to reach.
Rinsing
Cleaning chemistry has to leave, too.
After cleaning, required rinsing helps remove loosened soil and cleaning solution residues from device surfaces.
Rinsing requirements may depend on:
THE DEVICE
THE CLEANING AGENT
WATER QUALITY
THE CLEANING METHOD
MANUFACTURER INSTRUCTIONS
cLEANING ISN’T COMPLETE JUST BECAUSE THE SCRUBBING STOPPED.
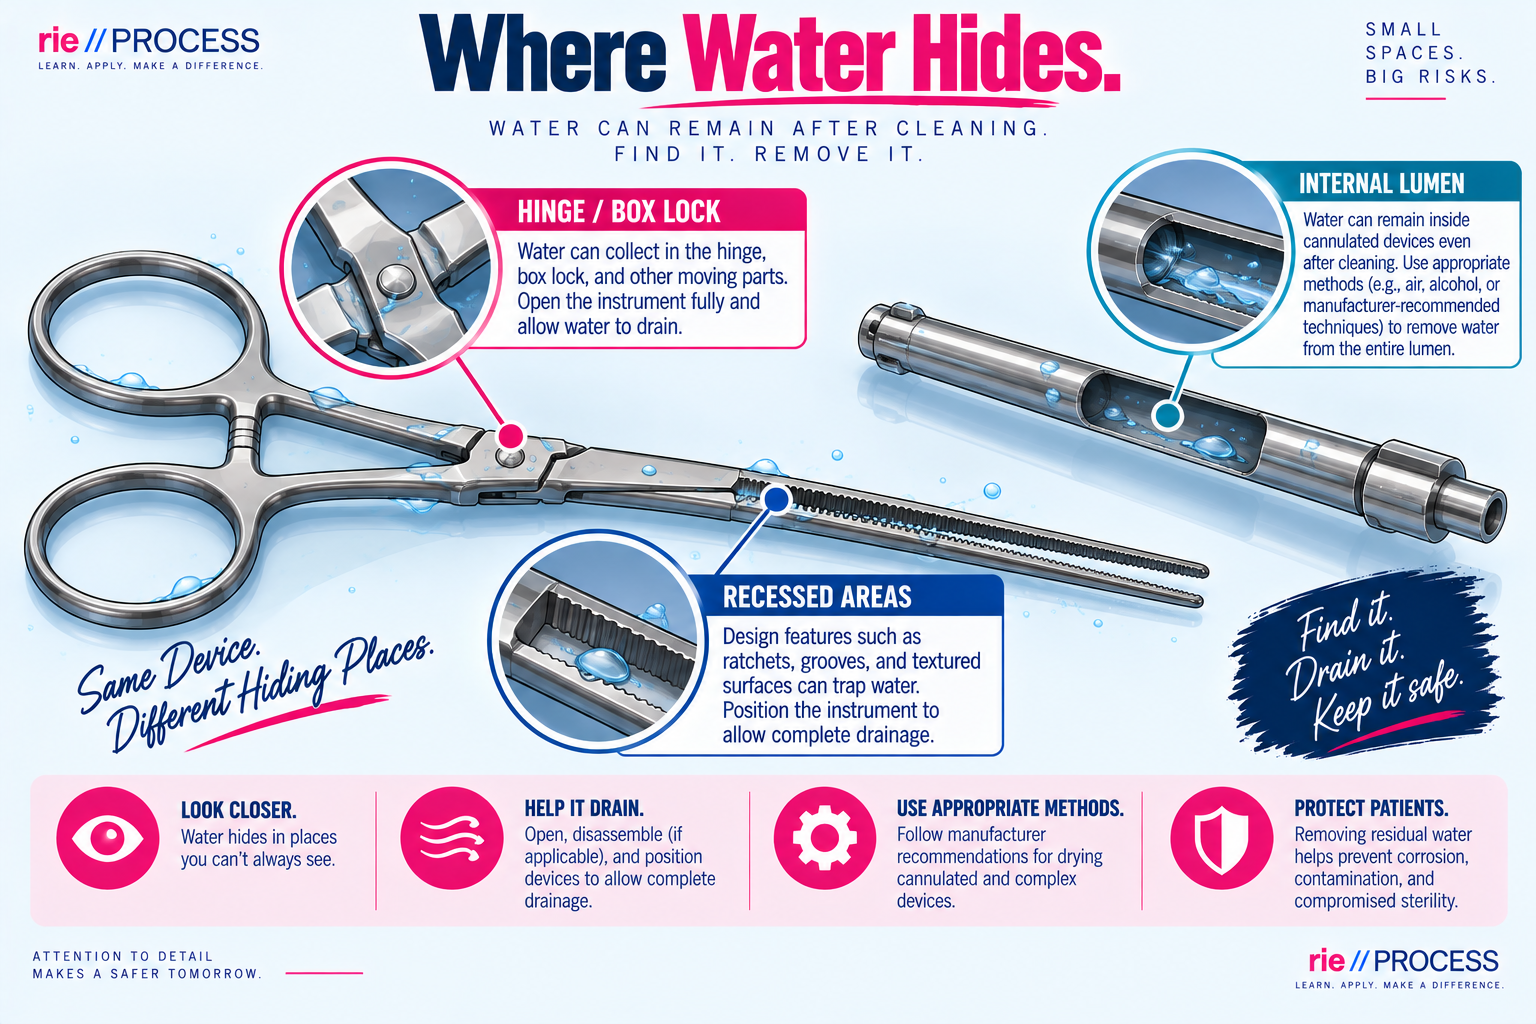
dRYING
wATER LEFT BEHIND ISN’T A FINISHING TOUCH.
Devices should be dried according to applicable instructions before they continue through reprocessing.
Pay attention to:
EXTERNAL SURFACES
HINGES + JOINTS
RECESSES
LUMENS
OTHER INTERNAL AREAS
Complex devices may require specific drying methods.
Don’t forget the places you can’t easily see.
Cleaning Verification
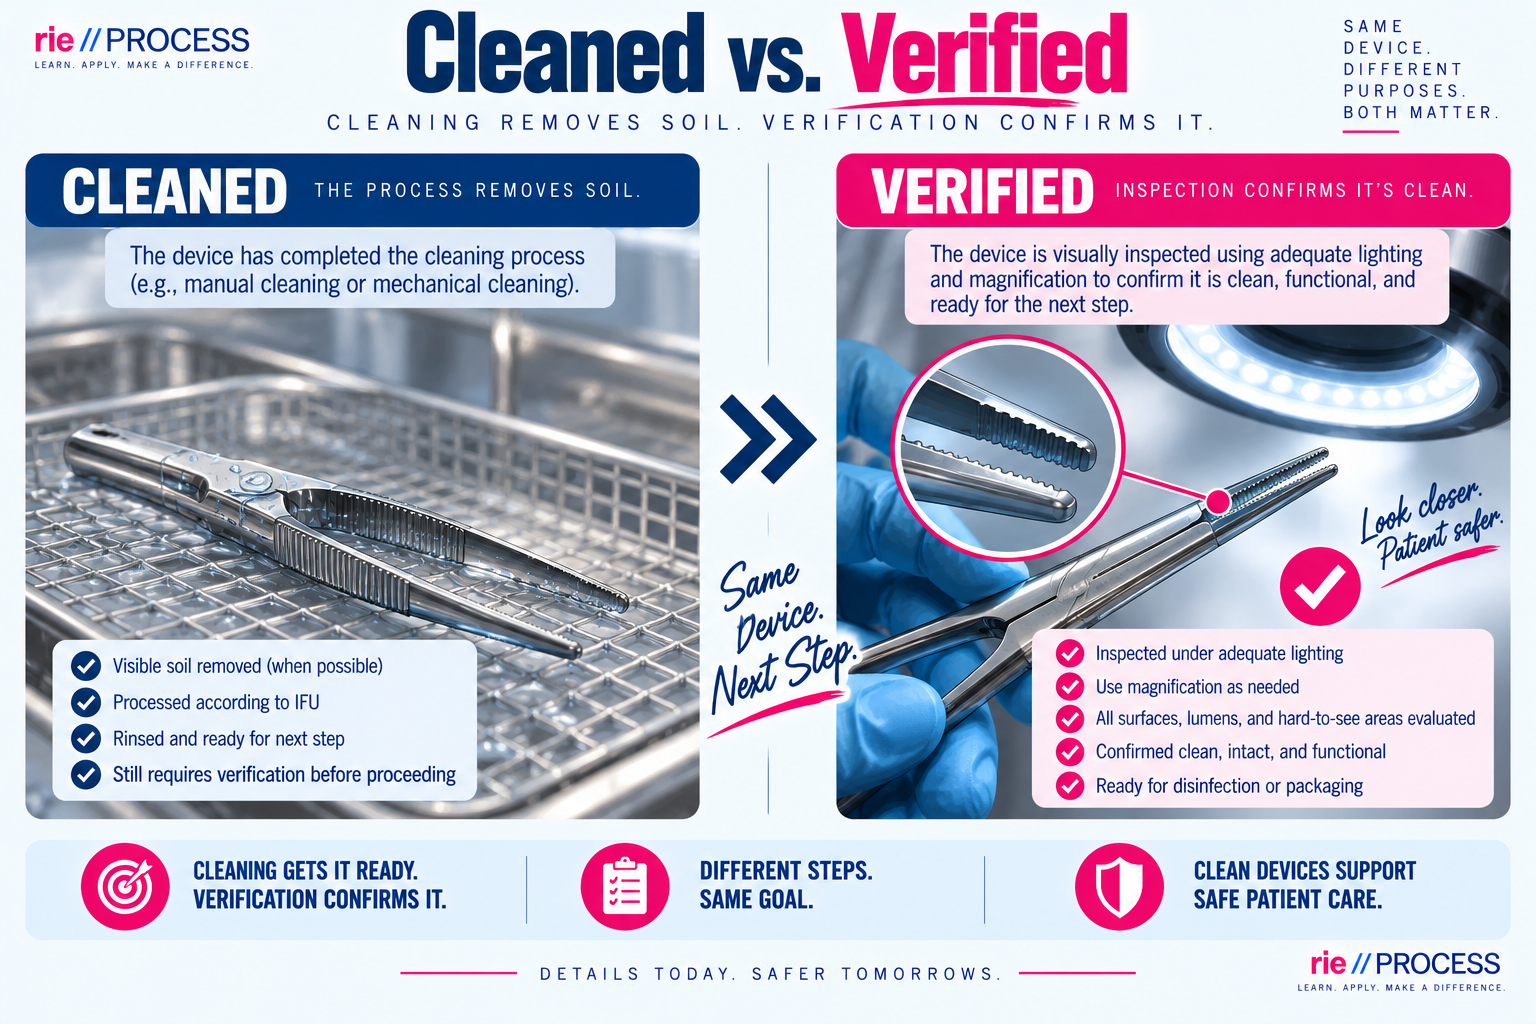
“I Cleaned It” Isn’t the same as “It’s Clean.”
The cleaning process should produce a device that meets the requirements to move forward.
Verification may involve:
VISUAL INSPECTION
ADEQUATE LIGHTING
MAGNIFICATION
INTERNAL INSPECTION
DEVICE-SPECIFIC TESTING
PROCESS OR EQUIPMENT MONITORING
The appropriate verification method depends on the device, process, equipment, and applicable requirements.
Cleaning is a process. Verification checks the result.
The Decision Point
Don’t send the problem forward.
You find:
VISIBLE SOIL.
RESIDUE IN A HINGE.
DEBRIS INSIDE A LUMEN.
A QUESTIONABLE INTERNAL SURFACE.
A DEVICE THAT WASN’T DISASSEMBLED CORRECTLY.
AN UNRESOLVED CLEANING CONCERN.
The answer isn’t:
“Sterilization will take care of it.”
STOP THE PROCESS.
Address the cleaning concern according the applicable instructions and facility procedures before the device continues.
Sterilization is not a substitute for cleaning.
Reality Check
The fastest path forward may be backward.
An instrument reaches inspection and visible residue is discovered inside a joint.
Sending it forward would save time.
Returning it to decontamination means rework and may delay the tray.
But the process has already answered the question.
THE DEVICE ISN’T READY.
Returning it for appropriate recleaning isn’t unnecessary work.
It is the quality system doing what it is supposed to do.
Code Breaker
When the device isn’t clean, start there.
Certification questions may surround a cleaning problem with distracting details:
The case is waiting.
The instrument is needed quickly.
The sterilizer is ready.
The department is busy.
A coworker says it is probably fine.
Strip those details away.
WHAT IS THE SAFETY-CRITICAL PROBLEM?
If the device has not been adequately cleaned, protect the process before protecting the schedule.
Take This With You
Don’t Ask Only: “Did We Wash It?”
Ask: “Did the cleaning process actually reach and remove the contamination?
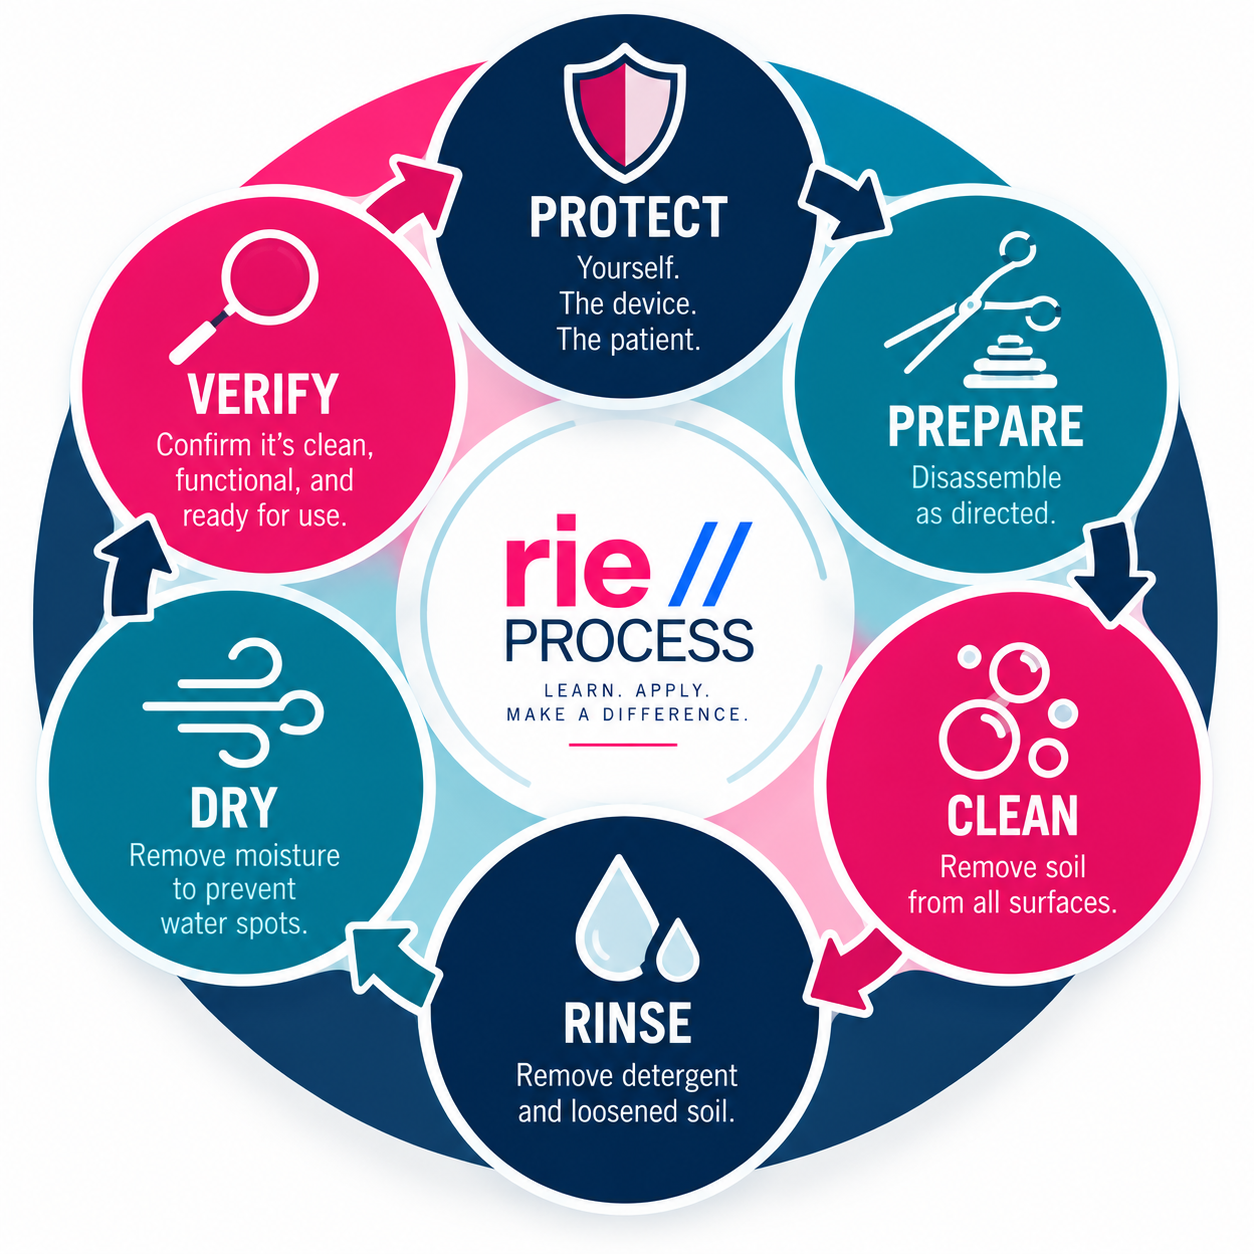
PROTECT yourself.
CONTAIN contamination.
PREPARE the device.
CLEAN every required surface.
RINSE appropriately.
DRY completely.
VERIFY the result.
Continue the Process
Cleaning opens the door to everything that follows.
Once a device has been appropriately cleaned, rinsed, dried, and verified, it can move toward the next stages of reprocessing.
Free educational content from rie//PROCESS.